Getting started with DeepCharts: install and license
Windows in English, a license key that is not your password, a feed profile attached to its exchange, a sim account sized like your evaluation: a clean first setup.
DeepChartsOFF is a Windows desktop application, not a web platform. There is no browser version and no mobile app: your own machine handles part of the order book and order flow computation, tick by tick, which is why the setup starts with the hardware rather than the login screen. The install itself takes a few minutes. What slows new users down is three things that have nothing to do with trading: the Windows display language, the difference between a license key and a data feed login, and a feed profile that is connected but never attached to an exchange.
This guide takes the whole path in order, from the machine check to a first simulated order on MNQ. Get it right once and the configuration stays saved through updates.
What your machine needs
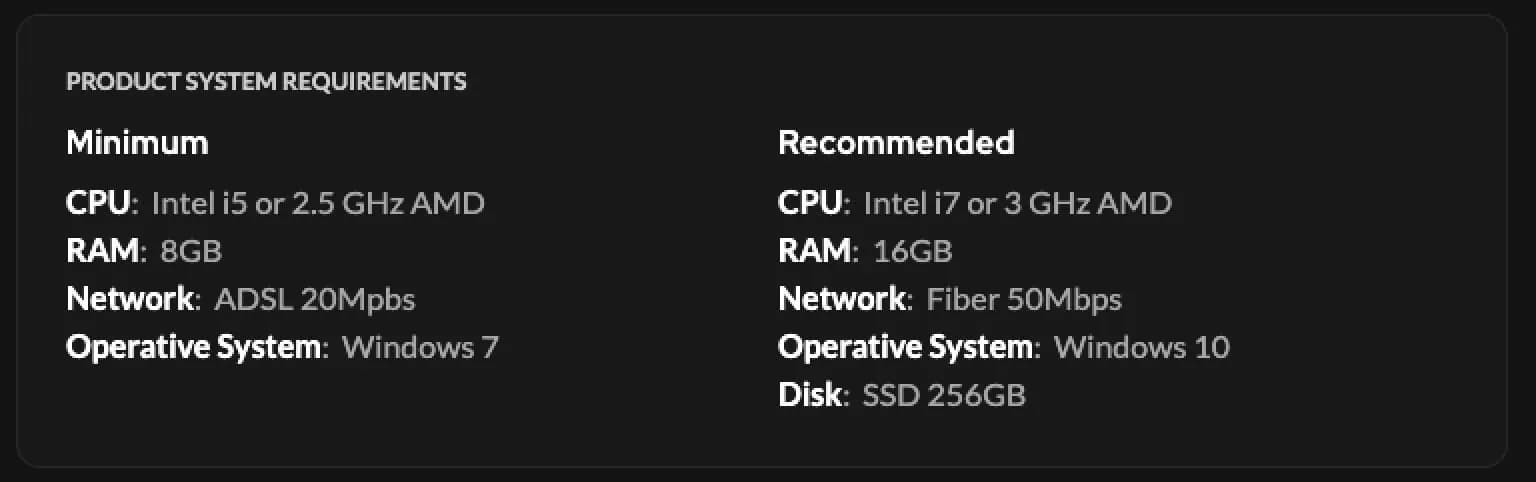
The setup to aim for is a Windows 10 or 11 PC with 16 GB of RAM, an i7-class processor and an SSD. The published minimum is lower (Intel i5 or 2.5 GHz AMD, 8 GB of RAM, a 20 Mbps connection, Windows 7), but that column is for a light workload. Once a footprint, a heatmap and a few indicators run side by side on NQ during the US open, the recommended column is the one that keeps the book from falling behind: Intel i7 or 3 GHz AMD, 16 GB, 50 Mbps fibre, Windows 10 and a 256 GB SSD. The disk matters more than most people expect, because the platform writes market data constantly.
Two components should be in place before you start: Microsoft .NET Framework 4.8 or later, and current Visual C++ Redistributables, both the x86 and the x64 packages.
On a Mac there is no native build. Traders run the platform inside a Windows virtual machine with Parallels Desktop, and the same numbers then apply to the virtual machine rather than to the Mac: give it at least 8 GB of RAM, 16 if you run several charts.
Install it cleanly the first time
A clean install comes down to four checks before you double-click anything.
- Switch Windows to English. The installer expects an English display language. On a French or German Windows it stops on a Setup Failed message, often with code 0x80070643. Change the display language in the Region and language settings, reboot, install, then switch back.
- Download from the portal only. The installer lives in your client area on my.deepcharts.com as DeepchartsInstaller.zip. There is no public download link and no other official source.
- Extract before you run. Right-click the archive, choose Extract All, then launch DeepchartsInstaller.exe from the extracted folder. The installer needs the files that ship alongside it.
- Pause third-party antivirus. Some antivirus tools quietly quarantine a component. Turn yours off for the install, then back on with an exception for the platform. Windows Defender on its own can stay enabled.
Accept the terms, click Install, keep free space on the C: drive (the installer writes there even when you pick another folder) and reboot if asked. If a setup ever fails, check the system language first and the Visual C++ packages second: between them they explain almost every case.
Activate the license key
The first launch asks for two things: the email address of your account and your license key. The key is an alphanumeric string found in your client area on my.deepcharts.com, and it is not your account password. Validation happens online and takes a few seconds.
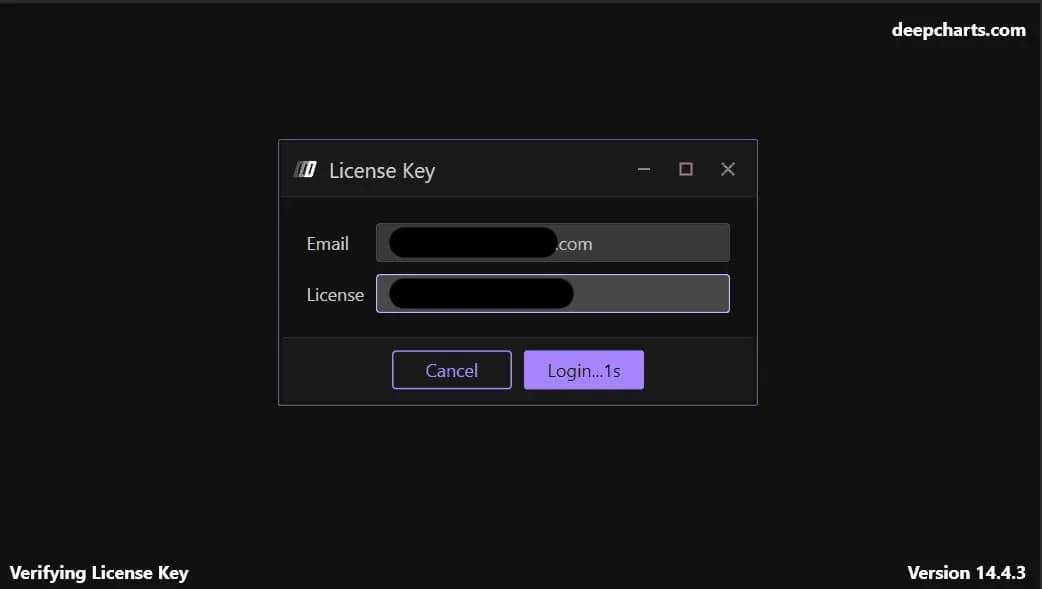
Keep three secrets apart from day one: the password of your portal account, the license key of the software, and the username and password of your data feed. None of them can stand in for another, and mixing them up is behind most of the questions new users ask in their first ten minutes.
Connect the data feed in two stages
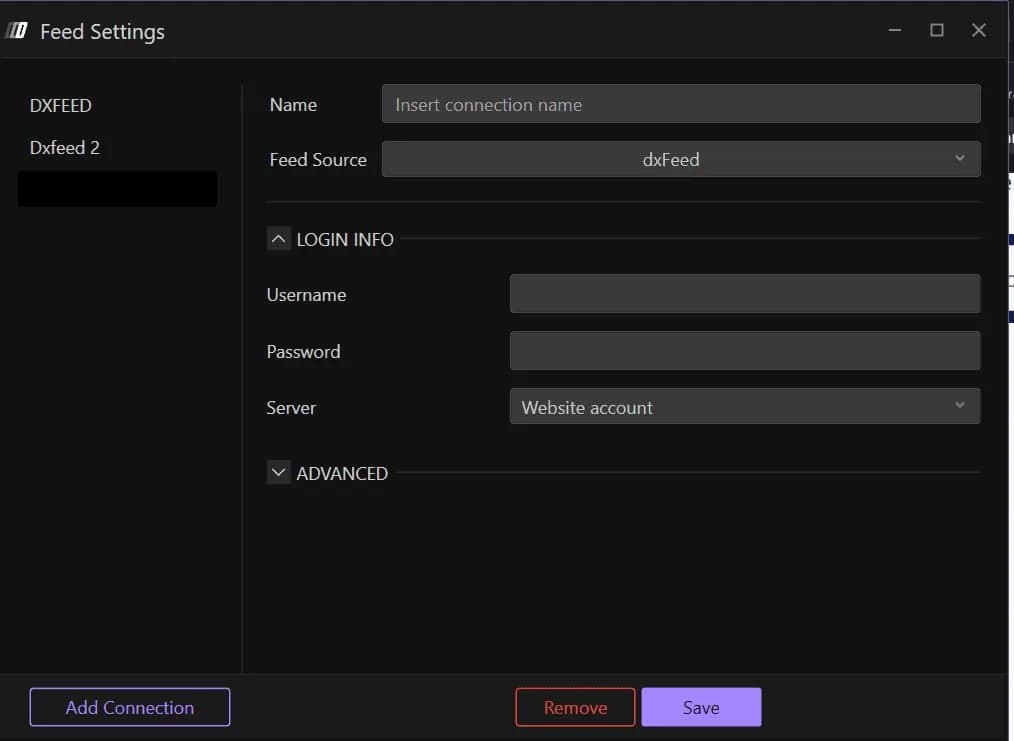
A data feed connects in two stages: you create a feed profile with its credentials, then you attach that profile to the exchange you trade. Skip the second stage and the connection looks healthy while every chart stays empty.
Stage one, the profile. Open the Feed menu in the top bar, then Feed Settings, and click Add Connection. Fill in a Name (free text, handy when you run more than one feed), the Feed Source you subscribed to, dxFeed for instance, and under LOGIN INFO the Username, Password and Server issued with the feed. Save, and a status indicator tells you whether the connection went through. If it does not, check the Server first: an otherwise correct profile will not connect to the wrong server.
Stage two, the exchange. Disconnect the profile, open the symbol manager from the same panel, and assign your profile in the Data Feed column next to the exchange you need: CME for NQ, ES and their micros. If the exchange is missing from the list, right-click to add it. Then reconnect.
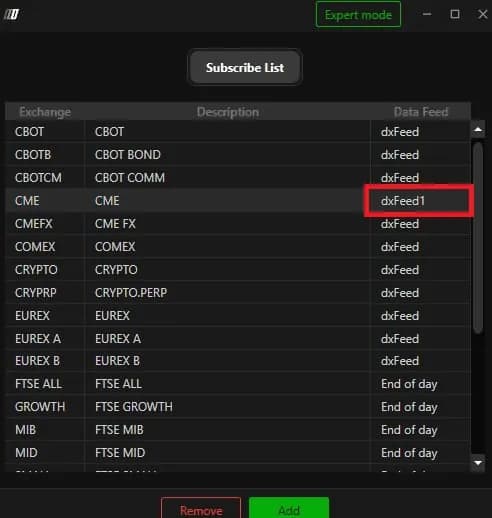
A connected profile with no exchange attached is the most common cause of a blank chart, and it looks like a connection problem when it is not. When a prop firm supplies the feed, its login goes into the same Feed Settings window. Which firms list the platform, and on which feed, is tracked in our list of firms that accept it.
Build a simulation account that matches your evaluation
The simulation account lets you trade live market data without risking money, and it is most useful when its balance matches the account you are preparing for. Go to Options, Settings, open the Sim Account tab and click Add. There are two fields: a Name and a Balance, which defaults to 10,000.
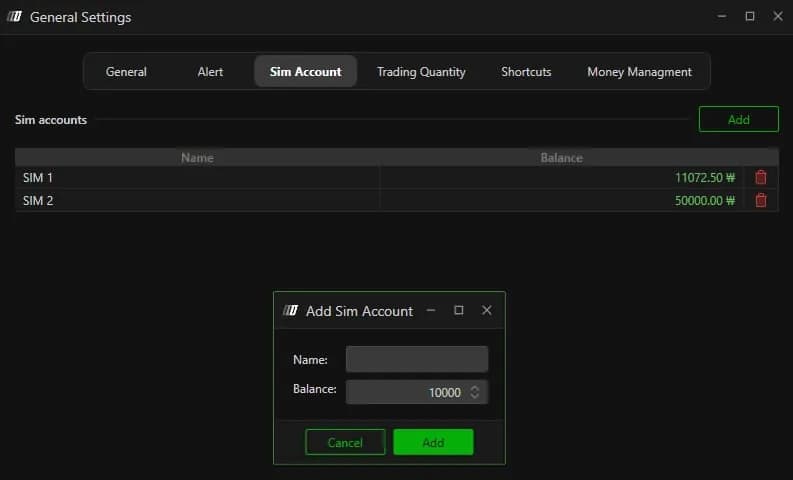
Enter the real size of the evaluation, 50,000 for a 50K account, and name it after the firm. Position sizing and daily loss habits only carry over if the simulated balance is the one you will actually trade.
| Setting | Default | What it changes |
|---|---|---|
| Name (Feed Settings) | Free text | Tells feed profiles apart when you run several |
| Server | Selection | Must match the server issued with the feed; the first thing to check on a failed connection |
| Data Feed (symbol manager) | Not attached | Links an exchange to your profile; without it charts stay empty |
| Balance (Sim Account) | 10,000 | Starting capital of the simulation account |
| Broker (trading panel) | SIM for simulation | Routes the chart's orders to the simulation account |
Open a chart and place a first simulated order
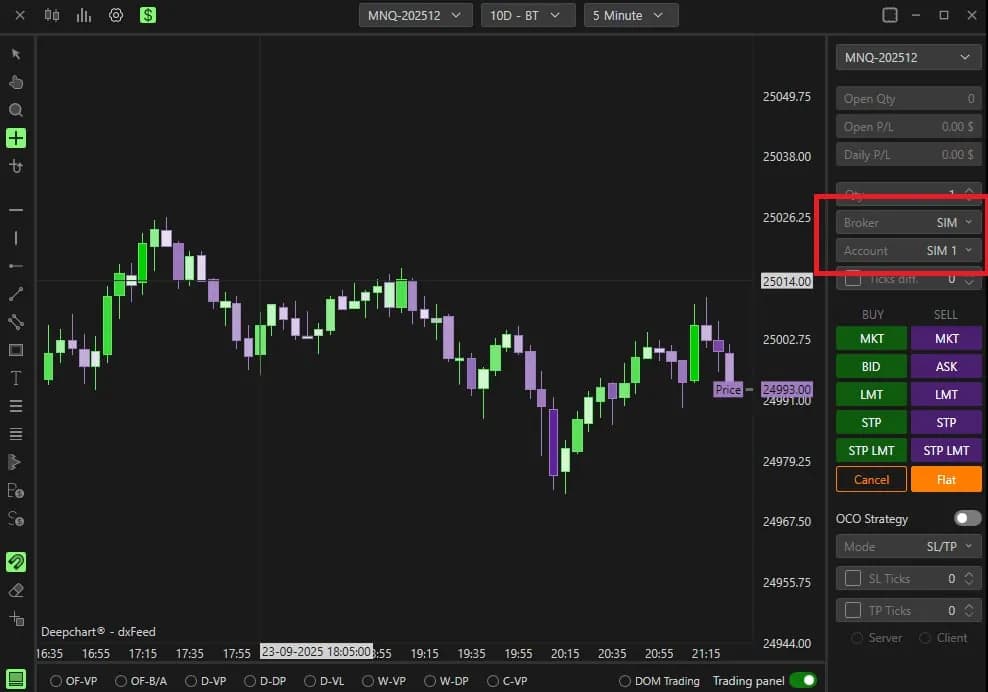
Your first order should be a simulated one on MNQ: it proves that the feed, the exchange attachment and the trading panel work together. Click New Chart and choose an instrument from the exchange attached to your feed. In the trading panel on the right, set Broker to SIM and Account to the one you just created. The BUY and SELL buttons now send simulated orders against live data, with market, limit and stop variants and a Flat button.
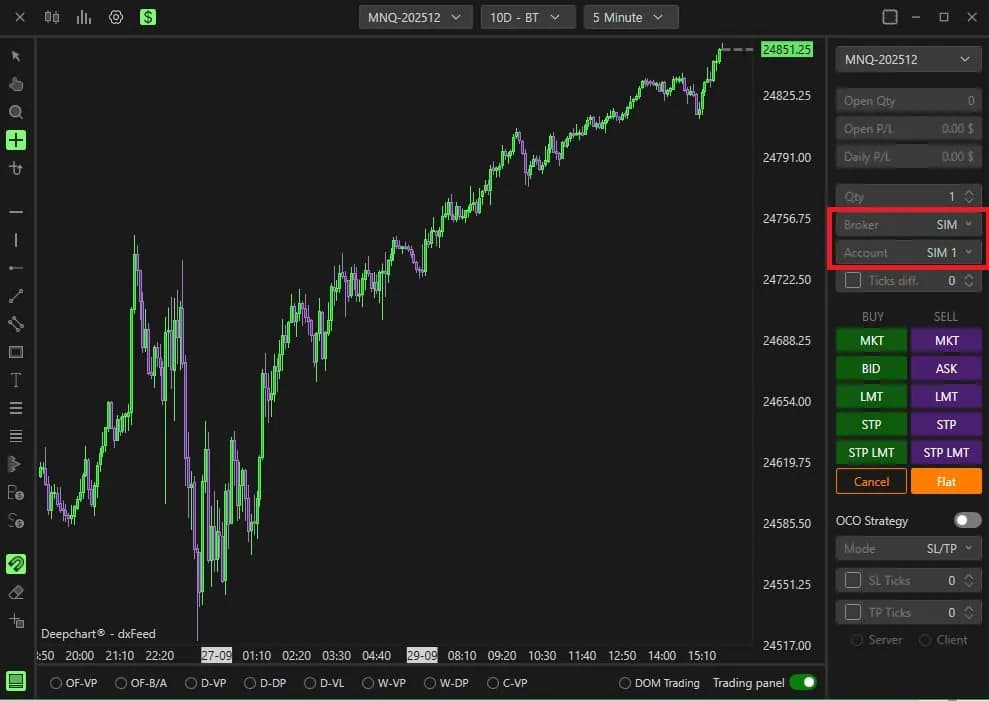
If the chart stays blank while the feed shows connected, go back to the symbol manager: the exchange attachment is missing, not the connection. From here the natural next step is the footprint itself, covered cell by cell in reading a footprint chart, followed by the tools that keep an evaluation inside the rules, in this overview for prop firm evaluations. Plans and data costs are listed on our platform page.
Firms that run DeepCharts